· Holt Ferris
Rotary vs. Fixed Fly Tying Vise
People ask me some version of this question at almost every tying demo I run: "do I actually need a rotary vise, or is that a gimmick?" The honest answer is that it depends on what you tie, but once you understand what rotation is actually doing for you, the choice gets a lot easier to make for yourself. It also isn't a new idea — rotary vises have been around in fly tying for decades, but the mechanism used to only show up on higher-priced tools. It's now common across a much wider range of price points, which is exactly why it's worth understanding rather than assuming it's just an upsell.
What "rotary" means, precisely
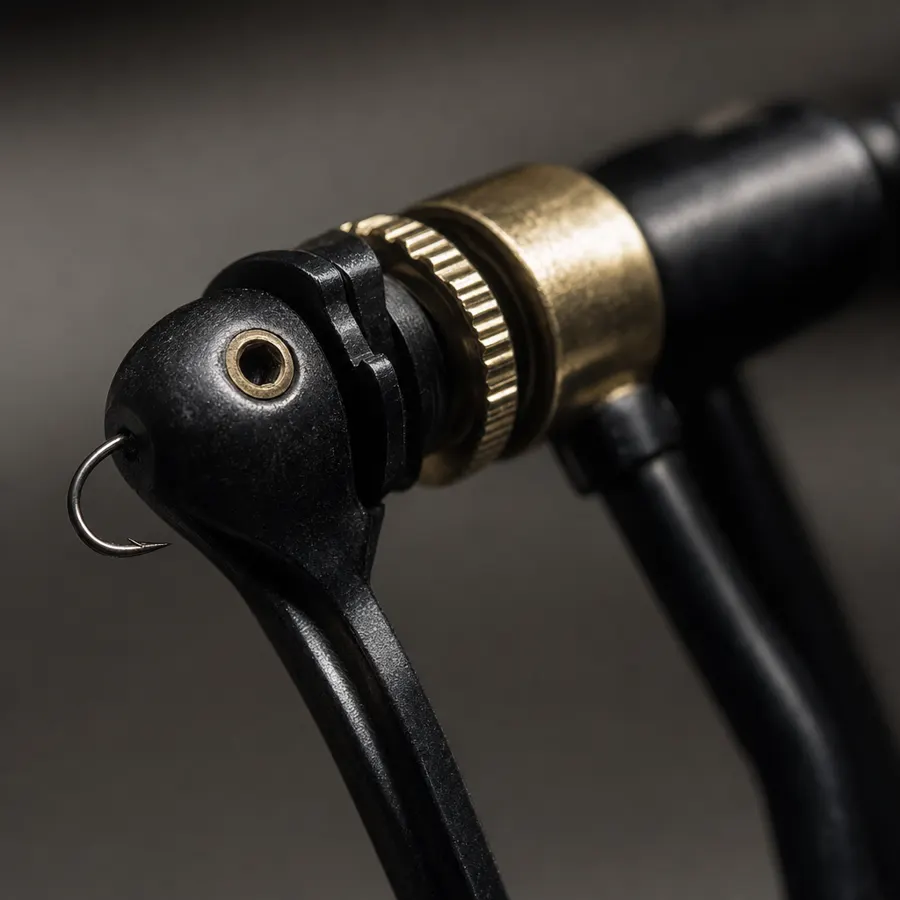
A true rotary vise lets you spin the hook shank in place, on its own axis, using a rotating collet or jaw assembly — the fly stays exactly where it was clamped, just turning like a rotisserie. That's different from a vise that merely tilts or swivels its whole head on a ball joint; that kind of adjustment repositions the fly for your viewing angle, but it doesn't let you spin material around the shank while wrapping. Our vise uses hardened-steel jaws riding on brass bushings for that rotation, holding hooks from #4 down to #24 with a jaw opening built for a tight, secure grip rather than a sloppy one that lets the hook shift mid-wrap.
Hook range covered by the Tailwater rotary vise's hardened-steel jaws
— Tailwater measurements, 2026
Where rotary actually helps
The clearest case is palmering hackle — winding a feather forward through a body, as in a Woolly Bugger. On a fixed vise, you either lean around the fly repeatedly to check the far side, or you finish blind and hope the wraps are even. On a rotary vise, you spin the fly toward you mid-wrap and see instantly whether the hackle is climbing evenly or bunching up. The same benefit applies to dubbing loops, wire ribbing, and any technique that wraps material in a spiral down the shank — you're checking your work from every angle without ever losing your grip on the hook.
Rotation also helps at the finishing stage. Spinning the finished fly slowly under a light, the way you'd turn a piece on a lathe, is often the fastest way to spot a gap in the hackle or an uneven thread wrap before you commit to the whip finish.
Where a fixed vise holds up fine
Not every tying style needs that inspection angle. If you mostly tie small dry flies — parachutes, comparaduns, simple soft-hackles — there's less spiraling technique happening, and a well-made fixed vise can hold a hook just as securely with a simpler mechanism and fewer moving parts to maintain. Some premium fixed-jaw vises are built around extreme jaw precision and durability at a given price point rather than rotation, and for a tyer whose patterns don't lean on palmering or ribbing, that trade-off is a completely reasonable one. Rotary isn't strictly "better" — it's a feature that pays off specifically for spiral-wrap techniques and for tyers who like to inspect as they go rather than at the end.
Do you need rotary for your very first fly?
No — you can tie a perfectly good first Woolly Bugger on any secure vise, rotary or not. What rotation changes isn't whether you can finish the fly, it's how easily you can catch mistakes while you're still tying it. For a beginner specifically, that early feedback loop — spinning the fly to check a wrap instead of finding the gap after you've already whip finished — tends to shorten the learning curve, which is a big part of why we built our starter vise as a rotary one instead of a basic fixed clamp.
| Rotary vise | Fixed vise | |
|---|---|---|
| Best for | Streamers, palmered hackle, wire ribbing, dubbing loops | Small dry flies, simple patterns, minimal spiral wraps |
| Inspecting wraps | Spin the hook without repositioning your hands | Lean around the fly, or unclamp to check the back side |
| Mechanism | Rotating jaws or collet on bushings | Fixed jaws, sometimes on a tilting or swiveling head |
| Learning curve | One extra motion (spinning) to get used to | Simplest possible mechanism to learn on |
How this shows up on our vise
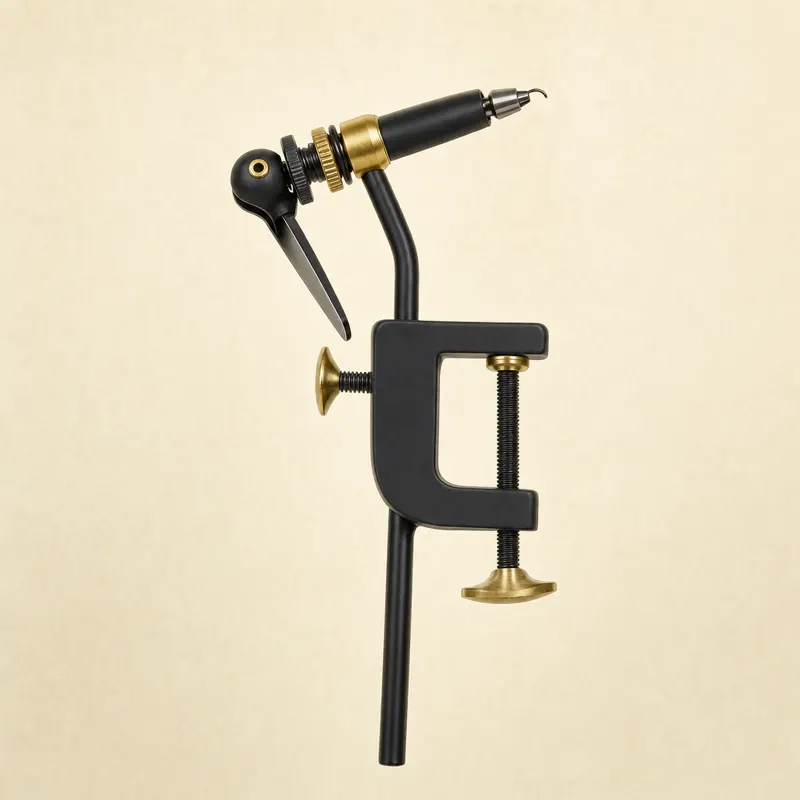
Our own rotary fly tying vise is built around this exact use case — a C-clamp base, hardened-steel jaws on brass bushings, and a full 360° spin so beginners tying their first Woolly Bugger or streamer pattern can check hackle and body wraps as they go instead of guessing. It's available on its own for $49.99, or bundled into our Complete Fly Tying Kit ($79.99) and Pro Fly Tying Tool Set ($84.99) for tyers who want the rest of the bench sorted at the same time. If you're setting up a first station around it, our fly tying desk guide covers clearance for the arm, and our thread guide covers pairing denier to the hook sizes this jaw range supports.
If you're deciding between a rotary and a fixed vise for your own bench, the honest short version is: buy rotary if you expect to tie streamers, palmered patterns, or anything with a spiral wrap; a fixed vise is a perfectly good choice if your tying stays mostly in small, simple dry flies and you'd rather keep the mechanism as simple as possible. See what buyers who made that call report on our reviews page, or read our how we test page for exactly what we check on jaw hold and rotary smoothness before a vise ships.